A Comprehensive Guide on Building and Deploying WEB3 Apps on Internet Computer Blockchain
Overview
The internet as we know it today is largely centralized - run by a handful of big tech firms that provide cloud services to host applications on their servers. This architecture gives more power and control to these tech companies that own the data centers that power the internet. The Internet Computer Blockchain aims to provide an alternative and robust solution that will allow developers to contribute ideas on development, build, and host their applications directly onto an open, decentralized network.
In this guide, you will learn the fundamentals of Internet Computer blockchain. Moreover, this guide will go over the step-by-step instructions for setting up your development environment and writing and deploying your smart contracts on Internet Computer Blockchain.
Let's get started!
1.0 What Is the Internet Computer?
Internet Computer is a layer 1 blockchain that is powered by the Internet Computer Protocol(ICP) which connects independent data centers globally to provide a decentralized open-internet alternative to the present centralized internet run by cloud providers such as Google and Amazon. Simply, it's a decentralized "world computer".
1.1 Internet Computer Protocol Architecture
The Internet Computer Protocol runs on servers called nodes that are hosted on independent data centers which are distributed globally. The individual nodes are grouped together into subnets. Each individual subnet constitutes its own blockchain running independently from other subnets. Internet Computer protocol connects all the subnets to give rise to the Internet Computer blockchain network.
1.2 Key Features in Internet Computer Blockchain
100% on-chain, no Cloud.
The Internet Computer blockchain technology stack allows developers to build and host arbitrarily scalable web3 DApps, Defi protocols, games, and metaverse projects that run end-to-end completely on-chain without relying on centralized cloud providers, unlike other blockchains such as Ethereum. This allows for complete decentralization.
This is achieved by deploying the applications as canisters. A canister on IC blockchain is a smart contract that bundles together both code and its states. Canister smart contracts can store data, serve HTML, CSS, and JavaScript files, and can respond to API requests. Processing HTTPS requests makes it easy to run online services completely on-chain allowing for complete decentralization.
The Network Nervous System(NNS)
The Network Nervous System is an open decentralized algorithmic system that governs the Internet Computer. Simply, the NNS serves as the governing DAO(Decentralized Autonomous Organization) for Internet Computer Blockchain.
The NNS allows any user to participate in governing by simply staking their ICP tokens into one or more neurons that make up the network nervous system. The neurons submit proposals and decide to adopt or reject them. Other key responsibilities of the NNS are: automatically upgrading the internet Computer protocol, onboarding new node providers, and adding node machines into the blockchain network.
Reverse Gas Model
One of the major hurdles to mass user adoption of blockchain solutions is the need for "gas" fees. Most blockchain solutions require users to purchase and hold tokens to pay for gas fees in order to interact with the blockchain. However, ICP solves this problem by implementing a reverse gas model which makes the smart contracts pay for their own execution, computation, and storage on-chain. Essentially, ICP eliminates the need for users to pay gas fees.
The smart contracts utilize cycles as gas fees --computational resources that power up the execution and storage of canister smart contracts on-chain.
Internet Identity
The Internet Computer blockchain allows users to create a new type of Internet Identity by creating sessions with Web3 services and DApps. This is achieved by building identification anchors to which suitable cryptographically enabled devices, such as a laptop’s fingerprint sensor, and a phone’s facial ID system can be assigned.
By using the devices attached to their anchors, to authenticate with any web3 application running on the Internet Computer Blockchain, users can ensure complete user anonymity - a key decentralization feature.
2.0 Building on Internet Computer Blockchain
Internet Computer provides a complete software development kit (SDK) that allows developers to easily build and deploy applications on the Internet Computer Network.
The SDK installation script installs several components essential in development, these are:
| Component | Description |
| dfx | DFINITY execution command-line interface (CLI) |
| moc | Motoko runtime compiler. |
| replica | Internet Computer local network binary. |
| uninstall.sh | Script to remove the SDK and all of its components. |
| versions | Cache directory that contains a subdirectory for each version of the SDK you install. |
2.1 Install ICP Blockchain SDK for Local Development
Internet Computer SDK supports two environments for local development: a Linux OS, and macOS. There is currently no native support for the SDK on a Windows OS. However, by installing the Windows Subsystem for Linux (WSL), you can run the SDK for local development.
2.1.1 Install the SDK on a Linux/macOS Machine
Run this command:
sh -ci "$(curl -fsSL https://internetcomputer.org/install.sh)"
2.1.2 Install the SDK on a Windows OS machine
Step 1: Follow Microsoft's instructions for installing Windows Subsystem for Linux(WSL).
Step 2: Once the Windows Subsystem for Linux has been installed, run this command on your Powershell terminal to confirm that everything is working correctly.
wsl --list --verbose
This should be the expected result:

A Linux distro(Ubuntu) will be installed together with the Windows Subsystem for Linux.

An Ubuntu terminal will also be accessible as an application from the start menu. This terminal will allow you to run commands in the installed Linux environment. We will use it to run commands to install ICP SDK for local development.
Step 3: Open up the Ubuntu terminal from the Start menu. Run the command below to install homebrew.
/bin/bash -c "$(curl -fsSL https://raw.githubusercontent.com/Homebrew/install/HEAD/install.sh)"
Homebrew will make it easier for us to install other tools such as NodeJS and Node Package Manager(NPM). If you already have NodeJS installed on your Windows system, since we will be working with WSL, you’ll need to install it on the Linux system too.
Check that everything worked by running this command:
brew -version
Step 4: Install NodeJS using homebrew by running the following command:
brew install node@16
Check that the installation was successful by running this command:
node -version
💡NOTE: If you have another version of Nodejs installed (e.g. previous version) then you need will link the version you just installed to homebrew. This will prevent any version conflicts.
Run this command to link:
brew link node@16
Step 5: Install the ICP SDK.
💡Note: This process from this point is similar for both a macOS and a Linux system.
Open the Ubuntu terminal, and run this command to install ICP'S SDK for local development on the ICP blockchain. Once this is done, you already to start developing locally.
sh -ci "$(curl -fsSL https://internetcomputer.org/install.sh)"
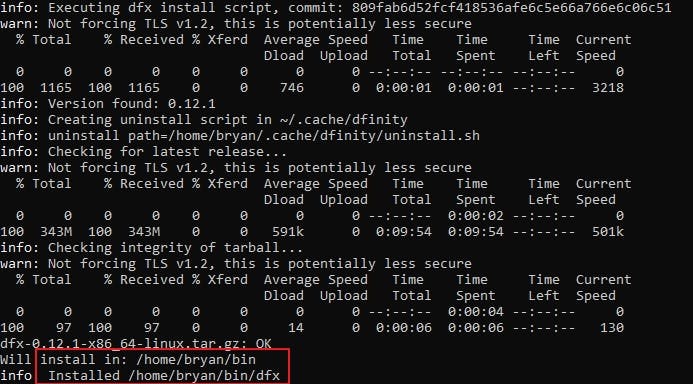
After the installation process is complete, take note of the installation path.
Copy the installation path you got from the last step and replace <REPLACE WITH YOUR INSTALLATION PATH> from the command below. This command defines the access path of the SDK in the Linux system.
In my case: export PATH=$PATH:/home/bryan/bin/dfx.
export PATH=$PATH:<REPLACE WITH YOUR INSTALLATION PATH>
Check that the SDK has been successfully installed by running the following command:
dfx --version
Now, you are ready to build and deploy your first DApp on the Internet Computer blockchain.
3.0 Create the Default Template Hello DApp
Step 1: Create a new folder to host the DApp's files. Run this command on your Ubuntu terminal to create a new folder and change the directory (cd) to that folder.
mkdir ICP-projects && cd ICP-projects
Step 2: In the new folder, run this command to create a starter ICP DApp template:
dfx new Hello
This process will take a couple of minutes and once it's done, you will see the ICP logo on the terminal.

You can view the new project in the folder you created by running the following command on your Ubuntu terminal:
explorer.exe .
3.1 Test the DApp on the Local ICP Replica Network
Internet Computer Blockchain SDK comes bundled up with an instance of software that implements the network's protocol on your machine called Replica. Simply, the replica provides a local instance of IC blockchain on your machine that you can use to deploy your DApps for testing before deploying to the main blockchain network.
To deploy and test the template Hello DApp created, follow the steps below:
💡Note: The steps below are demonstrated using a windows OS running the Windows Subsystem for Linux(WSL) with an Ubuntu distro. These steps are necessary in order to set up the required development environment while using a windows OS.
Step 1: Open up VSCode and click on the green icon on the status bar. It looks like this:
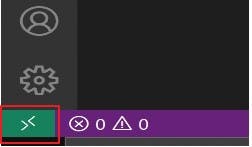
Step 2: Clicking the green button in step 1 above, will trigger the Vscode search bar to pop up. Select New WSL Window on the pop-up window. A new VS Code window will open running on the installed Linux system.

At the bottom left section of VS code, this will show:
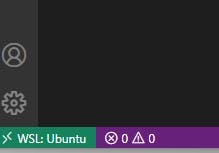
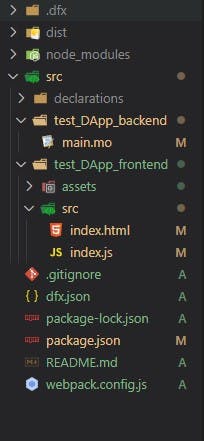
Step 3: Select the Open folder option to select the ICP-projects folder initially created and then select the project created. Once you open the project, this should be the expected folder structure:
Step 4: Open your terminal on VS Code, and run this command to spin up ICP's Replica local network:
dfx start
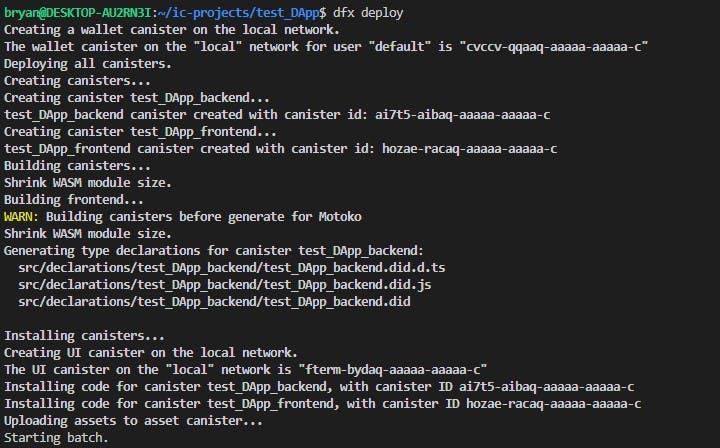
Step 5: Running the Replica will take a couple of minutes. Once you see running at http:127.0.0.1:< port number>, open a new terminal pane and run the command below:
dfx deploy
Step 6: After step 5 above is completed, run the command below:
npm start
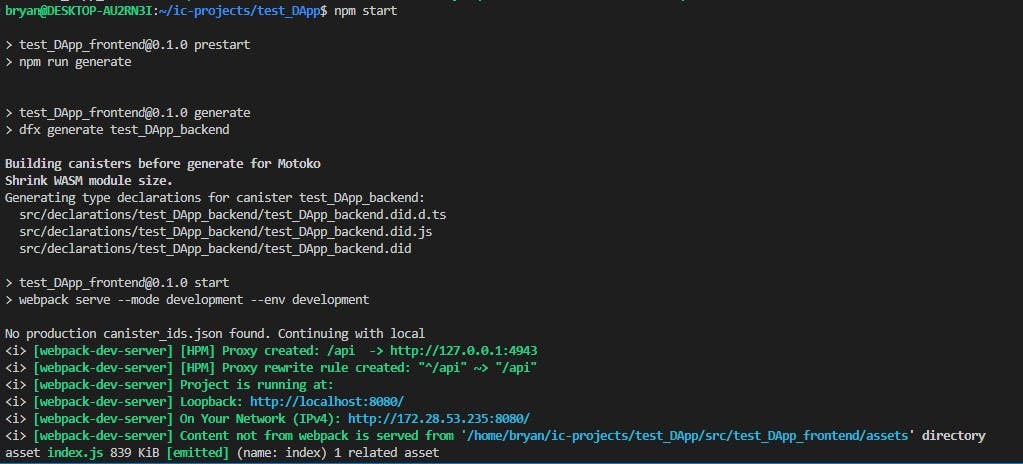
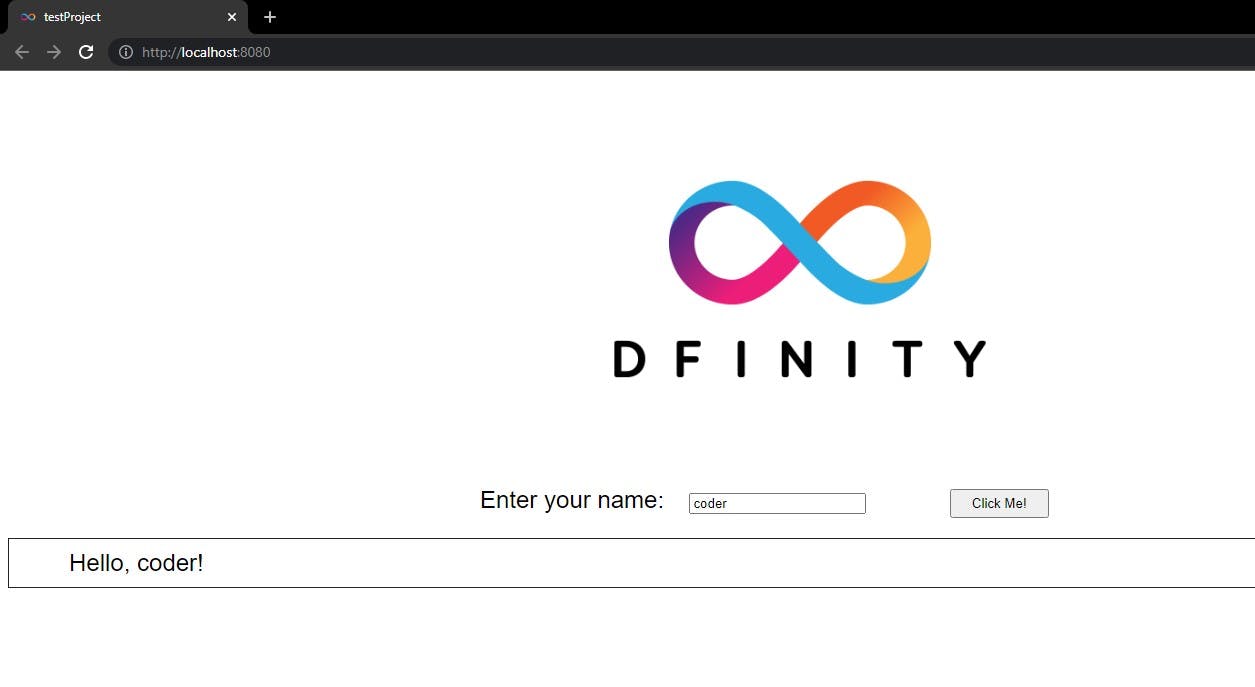
Now, navigate to http://localhost:8080/ to view the project on your browser. The Hello DApp ( a combination of a template frontend with boilerplate code and a backend deployed as a single canister smart contract) is now deployed on your local ICP blockchain network for testing.
For macOS users, to deploy the Hello Dapp on the Local replica network the steps above are similar. Open up VSCode and go to File → Open and select the Hello project in the ICP-projects folder and then run the commands above from step 4.
Let's start building.
4.0 Build a Decentralized Defi Application
To get started writing smart contracts that run on the ICP blockchain, we will use Motoko Programming Language. Motoko is a new type-safe language developed by ICP Dfinity's team to build applications that run on the Internet Computer blockchain network.
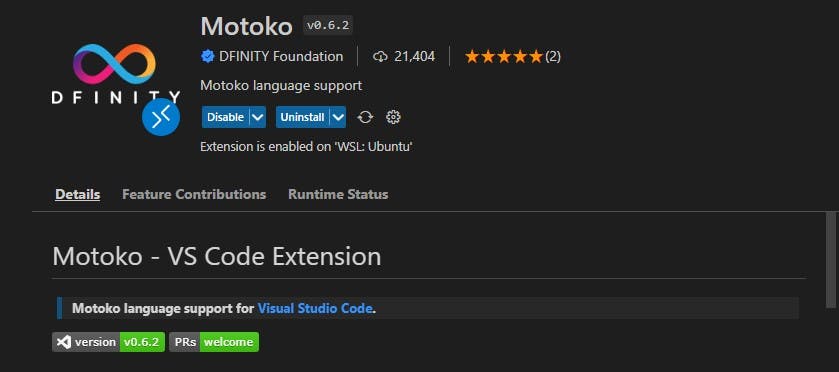
Motoko's compiler was installed together with the SDK, so you don't need to worry about installing anything else other than Motoko's extension on VS Code. The extension will make it easier to highlight Motoko's syntax on the code editor, code formatting, error checking, and making automatic imports.
Search for Motoko's extension on Vs Code's extension store.
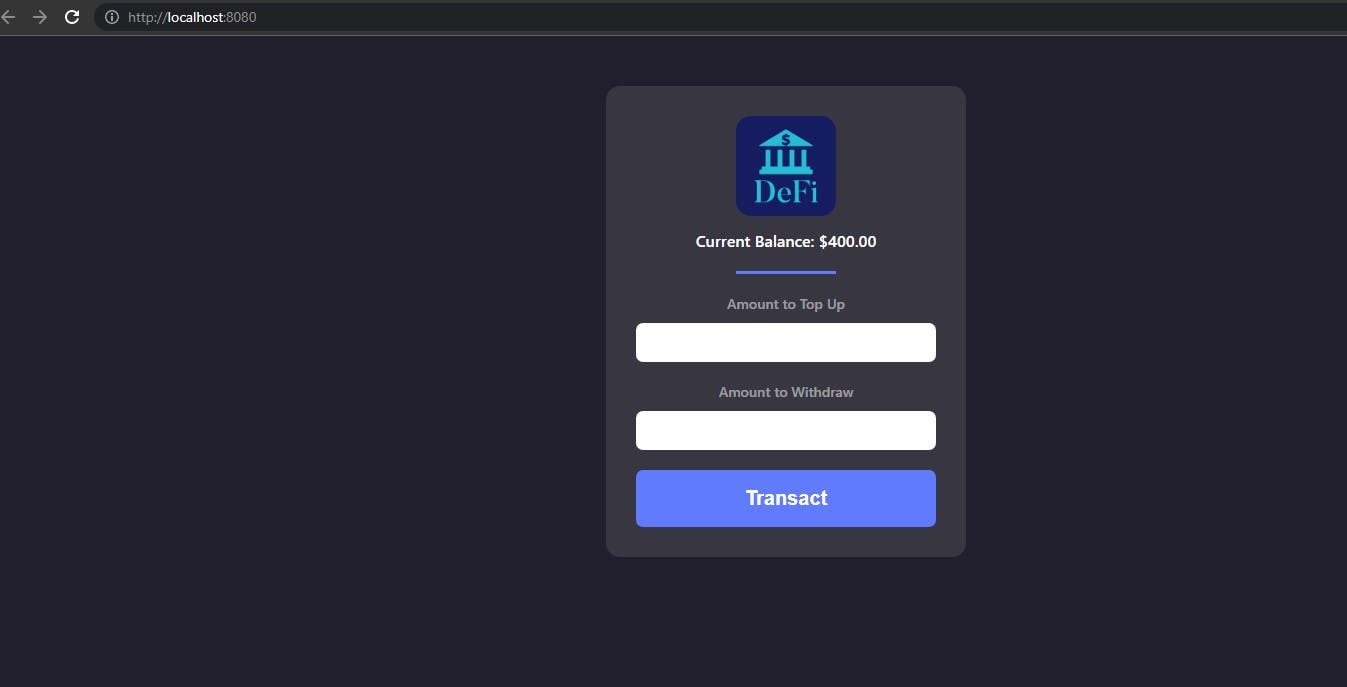
What we will be building: A simple Defi protocol that allows users to add funds, withdraw funds, and earn compound interest on their funds.
4.1 Motoko Canister Smart Contract
For this tutorial, we will not focus on writing the client-side application using a frontend framework such as React, however, we will focus on writing and deploying the DApp's Motoko's canister smart contract to the live Internet Computer Blockchain.
To follow along, you can clone and use the HTML, CSS, and, Javascript files provided in the Project's GitHub repository.
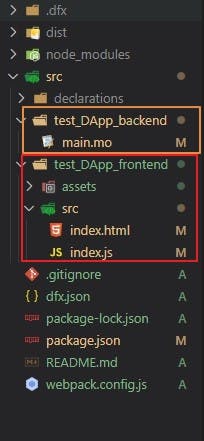
In the folder structure below, you will notice two folders get installed: a frontend folder with its files and a backend folder with main.mo Motoko file. We will use it to write the canister smart contract to manage the DApp's Logic and data storage.
ICP blockchain's smart contracts run completely on-chain. This is because the smart contract is deployed as a canister. The canister smart contract houses both the code and its states(data) therefore the need for data persistence using databases hosted off-chain becomes obsolete. While writing Motoko code, you will notice that the syntax is learner-friendly and easy to grasp.
Navigate to the backend/main.mo folder directory to write some Motoko code.
We will make the following imports:
import Debug "mo:base/Debug";
import Time "mo:base/Time";
import Float "mo:base/Float";
Most of Motoko's modules are housed within its base library. In this case, we are making 3 imports:
Debug module - used to write print statements to debug errors within the code.
Time module and a Float module that is used to change the data types on integer numbers to float.
In the Defi DApp, we will implement 4 functionalities:
💡Note: The Canister Smart code has been split into sections for easy visibility.
A function that manages current account balance. This function is called from the JS file to query and display the current balance.
 actor DefiDApp {
   stable var currentValue: Float = 400;
   stable var startTime = Time.now();

   public query func checkBalance(): async Float{
     return currentValue;
 };
In the code above, we create a new canister smart contract using Motoko's
actorkeyword. This canister will house the DApp's logic and data.Notice, the
stablekeyword before the variablecurrentValue. This keyword is used when you want data held by a particular data structure to persist. Meaning its current state will be retained. This eliminates the need for external databases.A function that adds funds to the account.
  public func addFunds(amount: Float){
     currentValue += amount;

   };
A function that withdraws funds.
  //fuction to widthdraw funds
   public func withdraw(amount: Float) {

     let tempValue: Float = currentValue - amount;
 // check that the amount withdrawn is greater than current balance
     if (tempValue >= 0) {
       currentValue -= amount;
     // print the current balance value on the terminal
       Debug.print(debug_show(currentValue));
     } else {
       Debug.print("Amount too large, currentValue less than zero.")
     }
   };
a function that compounds the funds and adds the interest to the current account balance.
 // function to compound interest
    public func compound(){

     let  currentTime = Time.now();
     let timeElapsedS = (currentTime - startTime)/1000000000;
     currentValue:= currentValue * (1.01 ** Float.fromInt(timeElapsedS));
     startTime:= currentTime;
    };

 }
The code above demonstrates a simple Motoko canister smart contract that implements 4 functionalities.
After making changes to the code, run dfx deploy on your terminal to view the changes on your browser. You can deploy as many times as possible on the local replica ICP network to test any changes made.
5.0 Deploy the Canister Smart Contract to the Main ICP Network
Internet Computer Protocol (ICP) tokens are the native utility tokens used in the Internet Computer ecosystem. These tokens have 3 main use cases:
Converted to cycles which are used to power up canister smart contracts on the blockchain.
Used as a trading asset in exchanges.
Used as governance tokens locked up in neurons within the Network Nervous System (NNS).
5.1 How Do Cycles Work?
ICP tokens are converted to cycles which are then used by developers to pay for the computing and storage resources consumed by canister smart contracts on-chain. Each individual canister must have an account with cycles used to pay for the resources it will require.
In order to deploy the canister smart contract developed to the main ICP network, you will need to acquire some cycles. There are two ways to do this:
Request and claim free cycles from the Dfinity Development team. This is the case if you are building a demo/ test DApp. Dfinity's team provides 20 free cycles that you can use to deploy and test your DApp on the live ICP network.
Follow these steps to request and claim free cycles to deploy and test your DApp on the main ICP network.
Convert ICP tokens to cycles.
Follow these steps to convert ICP tokens to cycles.
5.2 Deploy the Canister Smart Contract
Once you acquire some cycles, run this command below on your VS Code terminal to deploy the canister smart contract to the main ICP network:
dfx deploy --network ic
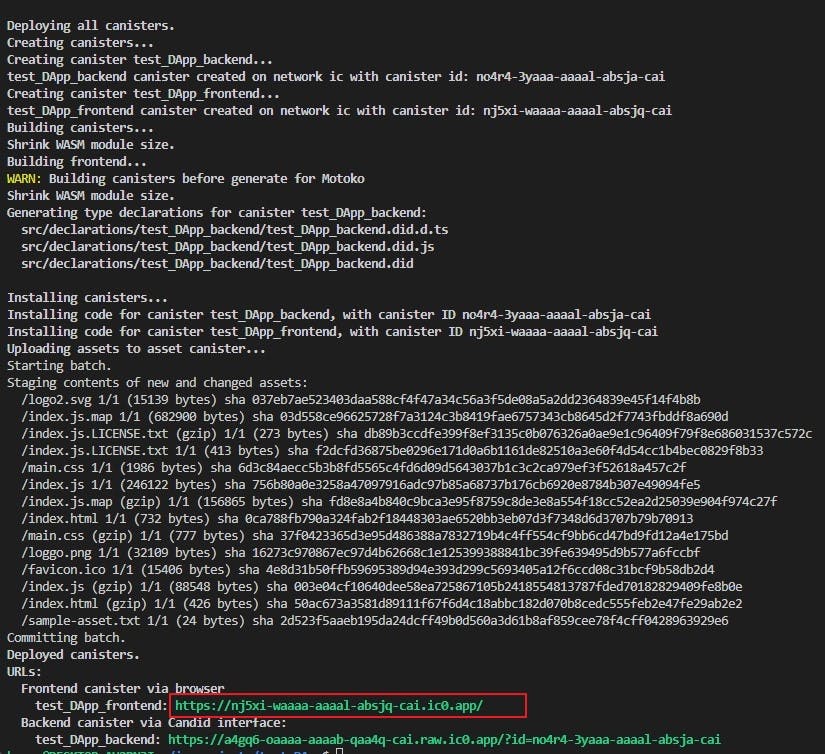
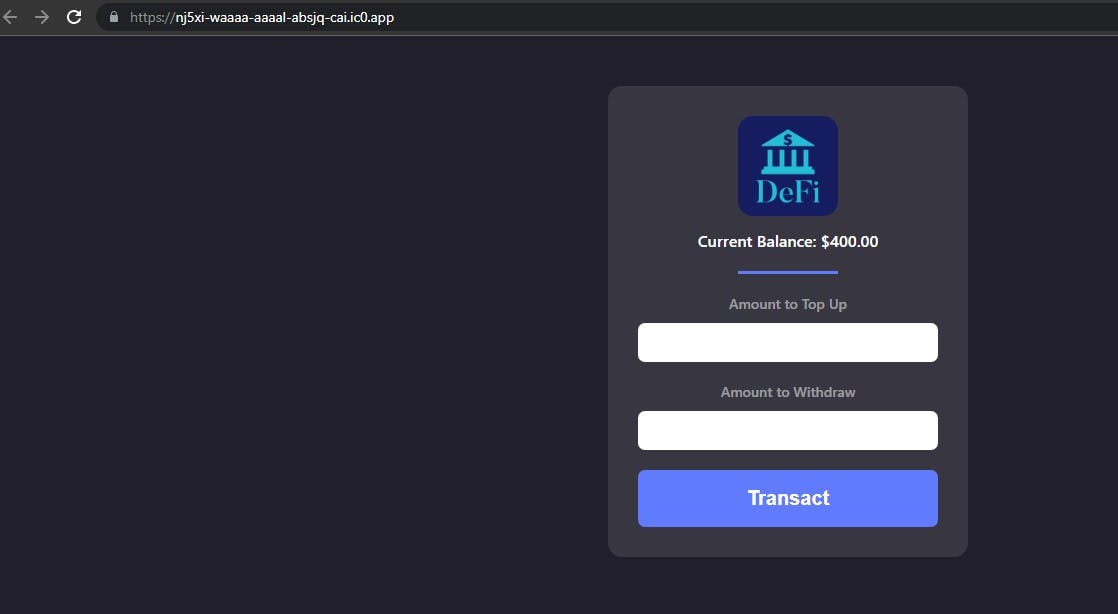
Once the contract has been deployed to the main ICP network, a clientside URL will be provided. You can use this URL to view the deployed version on your browser.
What gets deployed? Well, both the frontend files and the backend Motoko file. The Motoko file will process the requests sent by the client application and send HTTP responses on-chain.
Here is the link to the on-chain version of the Defi DApp.
Wrapping Up
In this guide, we explored the fundamentals of the Internet Computer Blockchain, its features, and how to get started deploying web3 applications on the ICP network.
Internet Computer Blockchain provides a fundamental decentralized alternative network to build decentralized applications. The network provides numerous impressive features for both developers and users alike, to build and scale applications with ease.
References
Microsoft's instructions for installing Windows Subsystem for Linux(WSL.
Install homebrew.
Internet Computer's Motoko Programming Language.
Steps to request and claim free cycles from ICP's development team.
Steps to convert ICP tokens to cycles.
